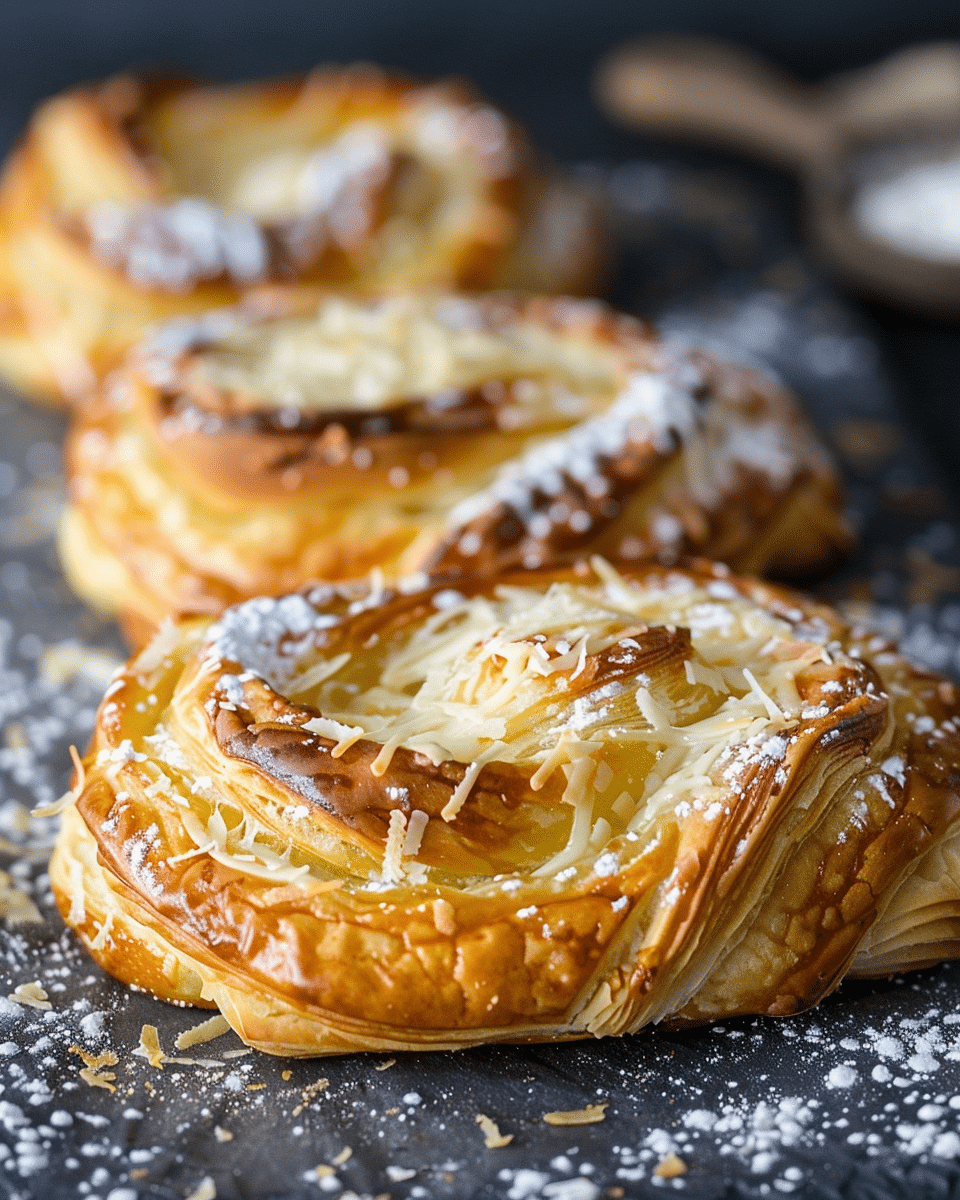
The Ultimate Cheese Danish is a decadent pastry with a golden, flaky crust and a rich, creamy cheese filling, making it the perfect balance of sweet and savory. It’s ideal for breakfast, brunch, or a special treat, and will definitely satisfy your cravings for something indulgent.
Why You’ll Love This Recipe
This Ultimate Cheese Danish is irresistibly delicious and surprisingly easy to make. The buttery, flaky pastry dough gives way to a smooth, velvety cheese filling that’s just the right amount of sweet and tangy. Topped with a light glaze, it’s the perfect combination of textures and flavors. Whether you’re serving it for a special occasion or just because, this pastry will quickly become a go-to favorite.

Ingredients
For the Danish Dough:
- 2 cups all-purpose flour
- 2 tablespoons granulated sugar
- 1/2 teaspoon salt
- 1 teaspoon instant yeast
- 1/2 cup whole milk, warm
- 1/4 cup unsalted butter, melted
- 1 large egg
- 1 teaspoon vanilla extract
- 1/2 cup cold unsalted butter (for laminating)
For the Cream Cheese Filling:
- 8 oz cream cheese, softened
- 1/4 cup powdered sugar
- 1/2 teaspoon vanilla extract
- 1 egg yolk
- 1 tablespoon all-purpose flour
For the Glaze:
- 1/4 cup powdered sugar
- 1 tablespoon milk
- 1/4 teaspoon vanilla extract
(Tip: You’ll find the full list of ingredients and measurements in the recipe card below.)
Directions
- Make the Dough: In a large bowl, mix the flour, sugar, salt, and yeast. In a separate bowl, combine warm milk, melted butter, egg, and vanilla extract. Gradually add the wet ingredients to the dry ingredients and stir until a dough forms. Knead for about 5 minutes until smooth. Cover with a towel and let it rise for about 1 hour, or until doubled in size.
- Prepare the Butter for Laminating: While the dough rises, place the cold butter between two sheets of parchment paper and roll it into a 1/2-inch thick square. Chill in the refrigerator until ready to use.
- Laminate the Dough: Once the dough has risen, turn it out onto a lightly floured surface. Roll the dough into a rectangle (about 12×8 inches). Place the cold butter in the center, then fold the dough over the butter like an envelope. Roll out the dough again into a long rectangle, then fold it into thirds. Repeat this process two more times, chilling the dough for 20 minutes between each turn.
- Make the Filling: In a medium bowl, beat the softened cream cheese, powdered sugar, vanilla extract, egg yolk, and flour until smooth and well combined.
- Assemble the Danish: Preheat the oven to 375°F (190°C). Roll the dough out one last time into a 12×12-inch square. Cut the dough into 4 equal squares. Place a spoonful of the cream cheese filling in the center of each square. Fold the corners of the dough into the center to form a pocket, leaving the center exposed.
- Bake the Danish: Place the filled dough squares on a baking sheet lined with parchment paper. Bake for 15–18 minutes, or until golden brown and flaky.
- Glaze and Serve: While the Danish bakes, whisk together the powdered sugar, milk, and vanilla extract for the glaze. Once the Danishes are done baking, remove them from the oven and drizzle the glaze over the top. Serve warm.
Servings and Timing
- Servings: 4
- Prep Time: 25 minutes (plus rising time)
- Cook Time: 18 minutes
- Total Time: 1 hour 45 minutes
Variations
- Berry Cheese Danish: Add a few spoonfuls of your favorite fruit jam (like raspberry or strawberry) on top of the cream cheese filling for a fruity twist.
- Almond Cheese Danish: Add a teaspoon of almond extract to the cream cheese filling for a nutty flavor. You can also sprinkle chopped almonds on top before baking for added crunch.
- Chocolate Cheese Danish: Mix in a tablespoon of cocoa powder to the cream cheese filling or top with mini chocolate chips for a sweet twist.
- Glazed Orange Cheese Danish: Add orange zest to the filling and substitute orange juice for the milk in the glaze for a citrusy flavor.
Storage/Reheating
- Storage: Store leftover Danish in an airtight container at room temperature for up to 2 days.
- Freezing: You can freeze the baked Danishes for up to 1 month. To reheat, place them in the oven at 350°F (175°C) for 5–7 minutes to restore their flakiness.
- Reheating: To reheat, microwave for 15-20 seconds or place in the oven for a few minutes to warm through.
FAQs
1. Can I make the dough ahead of time?
Yes, you can prepare the dough in advance, cover it, and refrigerate it overnight. Let it sit at room temperature for about 30 minutes before continuing with the laminating process the next day.
2. Do I have to laminate the dough?
Laminating the dough gives the Danish its signature flaky texture, but if you prefer a simpler option, you can skip this step and just roll out the dough. It won’t be as flaky but will still taste delicious.
3. Can I use puff pastry instead of making the dough from scratch?
Yes, you can use store-bought puff pastry to save time. Roll it out, add the filling, and bake according to the puff pastry package instructions.
4. Can I make this recipe dairy-free?
You can substitute the butter with a dairy-free alternative and use dairy-free cream cheese for the filling. The glaze can be made with a non-dairy milk.
5. Can I freeze the unbaked Danish?
Yes, you can freeze the unbaked Danish after assembling them. Once frozen, place them in a freezer-safe bag or container. When ready to bake, just pop them in the oven straight from the freezer and bake for about 25-30 minutes, adding a few extra minutes as needed.
6. How can I make this recipe gluten-free?
To make it gluten-free, use a gluten-free flour blend designed for baking. Keep in mind that gluten-free doughs may have a different texture, but it should still be delicious!
7. Can I use a different filling?
Absolutely! You can use ricotta cheese, mascarpone, or even a sweet custard as an alternative to the cream cheese filling. Add a touch of vanilla or your favorite flavoring to customize it.
8. How do I know when the Danish is done?
The Danish should be golden brown and puffed up when done. A toothpick inserted in the center should come out clean, and the pastry should feel firm to the touch.
9. Can I make mini cheese Danishes?
Yes, you can divide the dough into smaller squares to make mini versions. Reduce the baking time to about 10–12 minutes.
10. What’s the best way to serve Cheese Danish?
Cheese Danish is best served warm, right after baking, but it’s also delicious at room temperature. Pair with a cup of coffee or tea for a perfect treat.
Conclusion
The Ultimate Cheese Danish is a decadent, flaky, and creamy pastry that’s sure to impress. With a buttery crust, velvety cream cheese filling, and a sweet glaze, this is a breakfast or dessert that will have everyone asking for seconds. Whether you make it for a special occasion or just because, this Danish is a guaranteed crowd-pleaser!
Print
Ultimate Cheese Danish
- Total Time: 1 hour 45 minutes
- Yield: 4 servings
- Diet: Vegetarian
Description
The Ultimate Cheese Danish is a decadent pastry with a golden, flaky crust and a rich, creamy cheese filling, perfect for breakfast, brunch, or a special treat.
Ingredients
- For the Danish Dough:
- 2 cups all-purpose flour
- 2 tablespoons granulated sugar
- 1/2 teaspoon salt
- 1 teaspoon instant yeast
- 1/2 cup whole milk, warm
- 1/4 cup unsalted butter, melted
- 1 large egg
- 1 teaspoon vanilla extract
- 1/2 cup cold unsalted butter (for laminating)
- For the Cream Cheese Filling:
- 8 oz cream cheese, softened
- 1/4 cup powdered sugar
- 1/2 teaspoon vanilla extract
- 1 egg yolk
- 1 tablespoon all-purpose flour
- For the Glaze:
- 1/4 cup powdered sugar
- 1 tablespoon milk
- 1/4 teaspoon vanilla extract
Instructions
- Make the Dough: In a large bowl, mix the flour, sugar, salt, and yeast. In a separate bowl, combine warm milk, melted butter, egg, and vanilla extract. Gradually add the wet ingredients to the dry ingredients and stir until a dough forms. Knead for about 5 minutes until smooth. Cover with a towel and let it rise for about 1 hour, or until doubled in size.
- Prepare the Butter for Laminating: While the dough rises, place the cold butter between two sheets of parchment paper and roll it into a 1/2-inch thick square. Chill in the refrigerator until ready to use.
- Laminating the Dough: Once the dough has risen, turn it out onto a lightly floured surface. Roll the dough into a 12×8-inch rectangle. Place the cold butter in the center, then fold the dough over the butter like an envelope. Roll out the dough again into a long rectangle, then fold it into thirds. Repeat this process two more times, chilling the dough for 20 minutes between each turn.
- Make the Filling: In a medium bowl, beat the softened cream cheese, powdered sugar, vanilla extract, egg yolk, and flour until smooth and well combined.
- Assemble the Danish: Preheat the oven to 375°F (190°C). Roll the dough out one last time into a 12×12-inch square. Cut the dough into 4 equal squares. Place a spoonful of the cream cheese filling in the center of each square. Fold the corners of the dough into the center to form a pocket, leaving the center exposed.
- Bake the Danish: Place the filled dough squares on a baking sheet lined with parchment paper. Bake for 15–18 minutes, or until golden brown and flaky.
- Glaze and Serve: While the Danish bakes, whisk together the powdered sugar, milk, and vanilla extract for the glaze. Once the Danishes are done baking, remove them from the oven and drizzle the glaze over the top. Serve warm.
Notes
- For a spicier version, add a pinch of cinnamon or nutmeg to the cream cheese filling.
- If you’re short on time, you can use store-bought puff pastry instead of making the dough from scratch.
- This recipe can be made in mini versions. Just reduce the baking time to 10–12 minutes for smaller Danishes.
- If making ahead, you can prepare the dough and filling the night before and refrigerate until you’re ready to bake.
- Prep Time: 25 minutes (plus rising time)
- Cook Time: 18 minutes
- Category: Dessert, Breakfast
- Method: Baking
- Cuisine: American
Nutrition
- Serving Size: 1 Danish
- Calories: 320
- Sugar: 22g
- Sodium: 220mg
- Fat: 20g
- Saturated Fat: 12g
- Unsaturated Fat: 8g
- Trans Fat: 0g
- Carbohydrates: 33g
- Fiber: 1g
- Protein: 4g
- Cholesterol: 65mg


