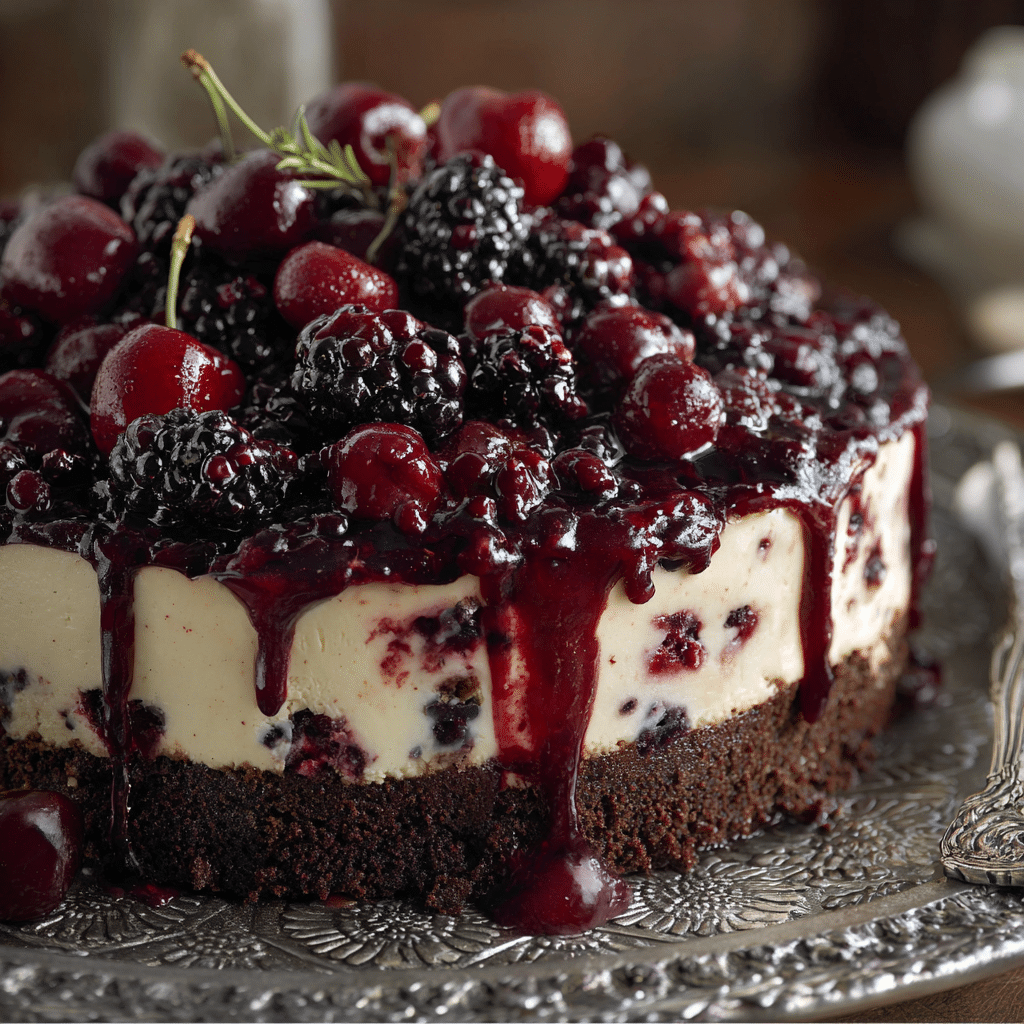
If you’re searching for a show-stopping dessert that combines elegance, nostalgia, and the irresistible pairing of chocolate and cherries, this Black Forest cheesecake will sweep you off your feet. The —
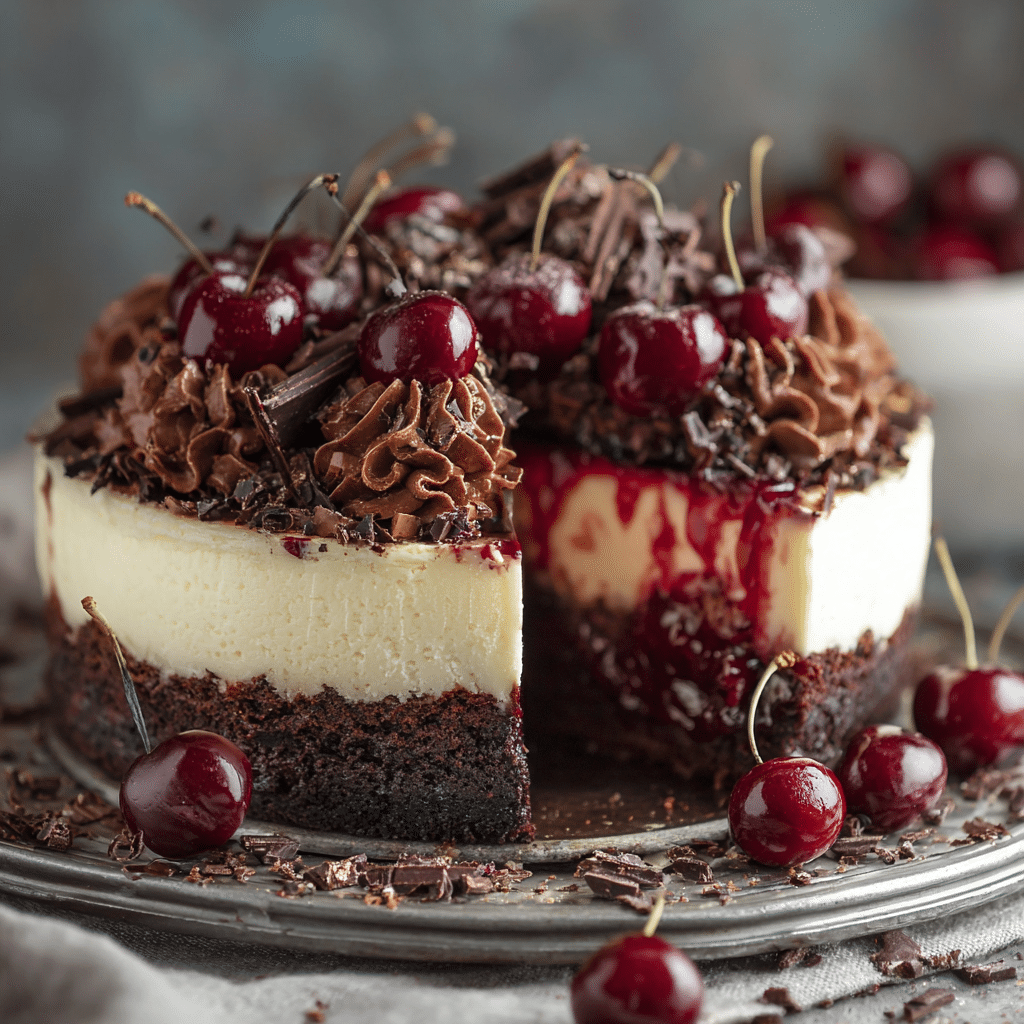
### layers creamy chocolate cheesecake atop a crumbly cookie crust, finished with juicy cherries, clouds of whipped cream, and a flourish of chocolate shavings. Every forkful delivers the magic of a classic Black Forest cake reimagined with decadent, creamy flair—making it a firm favorite for celebrations or any day you want to treat yourself and your loved ones.
Ingredients You’ll Need
What makes the —
### truly special is its list of simple, high-impact ingredients. Each one plays a role, working together to create that signature flavor harmony of chocolate, cherries, and dreamy creaminess.
- Chocolate cookie crumbs: Give the crust its deep, chocolatey crunch—a perfect base for that luscious filling.
- Granulated sugar: Adds sweetness and structure to both the crust and filling, balancing tartness from the cherries.
- Unsalted butter: Binds the crust, lending rich flavor and just the right texture.
- Cream cheese: The hero for the ultra-creamy, tangy cheesecake layer—make sure it’s fully softened for the smoothest result.
- Eggs: Help the cheesecake set with silky richness while maintaining its tender crumb.
- Semisweet chocolate: Melts into the batter, infusing the filling with real chocolate flavor, never artificial.
- Sour cream: Adds tanginess and softness, preventing the filling from feeling too heavy.
- Vanilla extract: Enhances all the flavors—just a little brings out the best in chocolate and cherries.
- Cherry pie filling: The classic topping—bright, tangy, and beautifully ruby red—perfect for capturing the essence of Black Forest.
- Heavy cream: Whips up into the most gorgeous, cloud-like topping—essential for a showstopper finish.
- Powdered sugar: Sweetens the whipped cream just enough without grit.
- Chocolate shavings: For that final flourish of chocolate, echoing the German original.
How to Make —
###
Step 1: Prep Your Pan & Oven
Start by preheating your oven to 325°F (160°C) and preparing a 9-inch springform pan. Grease the inside well to prevent sticking, then wrap the pan’s exterior with aluminum foil; this step is essential for keeping water out during the water bath, guaranteeing a smooth, crack-free —
Step 2: Craft the Chocolate Crust
Mix chocolate cookie crumbs with granulated sugar and melted butter in a bowl until everything looks like delicious, damp sand. Press the mix firmly into an even layer across the bottom of your pan—a measuring cup works wonders here. Bake the crust for 10 minutes so it firms up just right, then let it cool while you prepare the next layer.
Step 3: Blend the Cheesecake Filling
With a stand or hand mixer, beat the softened cream cheese together with granulated sugar until ultra-smooth and creamy—no lumps allowed! Next, gently add eggs one by one, mixing just until they’re incorporated. Stir in melted, slightly cooled semisweet chocolate, sour cream, and vanilla extract for a rich, glossy batter. This mixture is what gives —
Step 4: Assemble & Water Bath
Pour the cheesecake filling onto the cooled crust. Tap the pan gently on the counter to release any air bubbles, then set the springform inside a large roasting pan. Carefully pour hot water around the springform until it’s halfway up the sides—this “bain marie” method ensures your —
Step 5: Bake to Perfection & Cool Gradually
Bake the cheesecake for 55 to 65 minutes, watching for that magic moment where the center is just set but a little jiggly. Once it’s ready, turn off the oven and crack the door, letting the cake cool inside for an hour—this gentle chill helps prevent sinking or cracking. Bring it to room temperature, then chill in the fridge for at least 4 hours (overnight if you can stand the wait!).
Step 6: Make the Whipped Cream Topping
Just before serving, whip heavy cream with powdered sugar and vanilla until you get gorgeous, pillowy soft peaks. This is the finishing touch that makes —
Step 7: Decorate with Cherries & Chocolate
Spoon the cherry pie filling right over the center, then pipe or dollop generous swirls of whipped cream around the edges. Finish with a shower of chocolate shavings and step back to admire your masterpiece—the —
How to Serve —
Garnishes
The best part of presenting is piling on pretty garnishes. Swirls of freshly whipped cream make it feel like a true celebration, and a crown of shiny, plump cherries is both stunning and classic. If you want to impress, scatter chocolate shavings or curls over the top for that signature look—bonus points for adding a few fresh cherries if you can find them!
Side Dishes
This dessert is rich and lush, so it pairs beautifully with something light—think a simple espresso or strong coffee, which contrasts the sweet chocolate and cherry notes. If you want to add a little crunch, offer crisp almond biscotti or candied nuts on the side to round out the
Creative Ways to Present
For a special touch, serve in slender slices on chic dessert plates, each slice topped with an extra spoonful of cherries. Mini cheesecakes are also adorable for parties—just divide the batter among lined muffin tins. Or, try layering crumbled crust, filling, and toppings in parfait glasses for beautiful, individual desserts that are as fun to make as they are to eat!
Make Ahead and Storage
Storing Leftovers
Keep any leftover covered in the fridge for up to 4 days. The flavors meld even more after a night or two, so you might just find that second-day slices taste even richer and more satisfying!
Freezing
If you need to make well in advance, you’re in luck—it freezes beautifully. Simply wrap the cooled, undecorated cheesecake tightly in plastic wrap and foil, then store it in the freezer for up to 2 months. Thaw overnight in the fridge before adding cherries and whipped cream.
Reheating
While is truly meant to be enjoyed cold, if you accidentally freeze your decorated cheesecake, allow it to thaw gently in the refrigerator to preserve the creamy texture. No reheating is needed—just let it come to the perfect, cool serving temperature.
FAQs
Can I use fresh cherries instead of canned pie filling?
Absolutely! When fresh cherries are in season, pit and lightly simmer them with a spoonful of sugar and a splash of lemon juice until juicy and just tender, then use this homemade cherry topping instead of canned for a beautiful twist on
Do I really need to use a water bath?
For with that ultra-smooth, crack-free finish, a water bath is your best friend. It keeps the baking environment gentle and steamy, so the cheesecake bakes evenly and stays perfectly creamy.
Can I make this cheesecake gluten-free?
Yes, simply swap the chocolate cookie crumbs for your favorite gluten-free variety for a everyone can enjoy. Double-check that your other ingredients (especially chocolate) are also gluten-free if you’re serving someone with allergies.
How do I prevent cracks in my cheesecake?
The biggest crack-proofing secrets for are: don’t overbake, cool slowly in the oven, and run a thin knife around the edge before cooling to release the cake from the pan. All these tricks will minimize cracks and give you the prettiest possible slices.
What can I use instead of sour cream?
If you’re out of sour cream, plain Greek yogurt makes a great substitute in . It adds the same creamy tang and softens the cheesecake’s texture just as beautifully.
Final Thoughts
If you’re ready to make a dessert that dazzles at any party or family gathering, is calling your name. One slice is all it takes to see why this chocolate-cherry cheesecake is so beloved—don’t be surprised if it becomes your most-requested recipe from here on out!
Print
Decadent Black Forest Cheesecake Recipe
- Total Time: 5 hours 35 minutes
- Yield: 12 servings
- Diet: Vegetarian
Description
Indulge in the decadent and rich flavors of this Black Forest Cheesecake, featuring layers of creamy chocolate cheesecake, tart cherries, and whipped cream. Perfect for special occasions and guaranteed to impress your guests.
Ingredients
For the crust:
- 1 ½ cups chocolate cookie crumbs
- ¼ cup granulated sugar
- 6 tbsp unsalted butter, melted
For the filling:
- 24 oz cream cheese, softened
- 1 cup granulated sugar
- 3 large eggs
- 8 oz semisweet chocolate, melted and slightly cooled
- ½ cup sour cream
- 1 tsp vanilla extract
For the topping:
- 1 can (21 oz) cherry pie filling
- 1 cup heavy cream
- 2 tbsp powdered sugar
- 1 tsp vanilla extract
- Chocolate shavings, for garnish
Instructions
- Preheat oven to 325°F (160°C). Grease a 9-inch springform pan and wrap the outside with foil.
- In a bowl, mix cookie crumbs, sugar, and melted butter. Press mixture firmly into the bottom of the pan. Bake crust for 10 minutes. Set aside.
- Beat cream cheese and sugar until smooth. Add eggs one at a time, mixing just until blended. Stir in melted chocolate, sour cream, and vanilla.
- Pour filling over crust. Place the pan in a roasting pan and fill halfway with hot water for a water bath.
- Bake for 55–65 minutes, until the center is almost set but slightly jiggly. Turn off the oven, crack the door, and let the cheesecake cool inside for 1 hour.
- Remove, cool completely, then refrigerate for at least 4 hours or overnight.
- Before serving, whip heavy cream with powdered sugar and vanilla until soft peaks form.
- Top cheesecake with cherry pie filling, whipped cream swirls, and chocolate shavings.
Notes
- For extra decadence, drizzle melted chocolate over the top before serving.
- Fresh cherries can replace canned filling when in season.
- Store leftovers covered in the refrigerator for up to 4 days.
- Prep Time: 30 minutes
- Cook Time: 1 hour 5 minutes
- Category: Dessert / Holiday Dessert / Cheesecake
- Method: Baking / Water Bath
- Cuisine: German-Inspired / European
Nutrition
- Serving Size: 1 slice
- Calories: 450
- Sugar: 24g
- Sodium: 320mg
- Fat: 32g
- Saturated Fat: 18g
- Unsaturated Fat: 10g
- Trans Fat: 0g
- Carbohydrates: 38g
- Fiber: 2g
- Protein: 7g
- Cholesterol: 125mg

